TuneRS Mall Logo
We’re expanding our online store!
We’re improving our website and adding new parts daily.
Can’t find a part or need help with an order? Contact us—we’re happy to help.
← All installation guides

TuneRS technical resources

Power Steering Oil Cooler

Hose preparation, cooler mounting and model-specific connections.

986 Boxster / 987 Boxster & CaymanTRS-PSC-98612 steps
Download guide PDF
Before you begin

Part Number: TRS-PSC-986

Please follow the instructions below step by step to ensure correct installation. We recommend professional installation. Failure to follow instructions may result in damage to components or vehicle. We are not responsible for improper installation.

This power steering cooler kit helps lower operating temperatures on the power steering hydraulic fluid. We highly recommend this kit for heavily tracked vehicles.

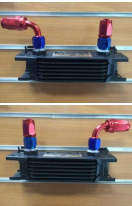
Kit contents: Before you begin — photo 1
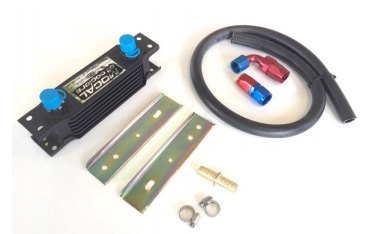
  • 1 length power steering fluid hose (4 ft)
  • Left and right mounting brackets
  • 2x anti-vibration mounts
  • 4x nuts for anti-vibration mounts
  • 3x hose clamps (for 986) / 4x hose clamps (for 987)
  • 1x Mocal Oil Cooler
  • 1x -8AN 90 degree fitting
  • 1x -8AN straight fitting
  • 1x barbed fitting (for 986) / 2x barbed fitting (for 987)
  • Rivets are not included.
  • CHF202 power steering fluid not included

Installation steps

1Step 1Verify the kit components
Open your kit and verify all components listed above are with your kit. If anything is missing please contact us.
2Step 2Cut the power steering hose
You should have received 1 length of 4ft power steering hose with your kit. You will need to cut this hose into two lengths of 2ft each. You may need to trim the hoses down later in size once you start to mock it up to the vehicle.

Cut the power steering hose — photo 1

3Step 3Prepare the hose ends
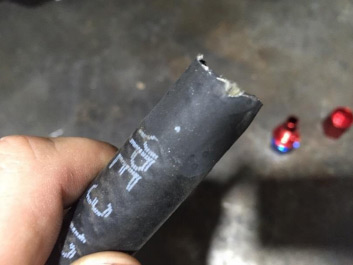
On one end of the power steering hose length (now that you have cut it into two pieces), you will need to shave down the hose slightly. The hose is slightly larger than the inner diameter of the AN8 fittings, so to ensure a complete fit this will need to be done.

Prepare the hose ends — photo 1

4Step 4Insert the hoses into the AN8 fittings
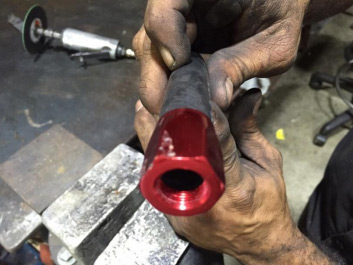
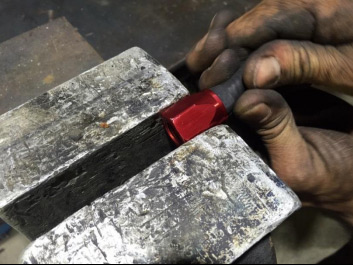
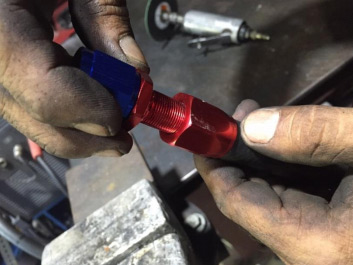
Once you have shaved down the hose end slightly, you will need to insert that end into the AN8 fittings provided (90 degree and straight). Do not install both AN fittings to the same hose. Before attempting this, make sure to untwist the AN8 fittings and separate the two halves of them. After you have done that, you will need something to hold the fitting tight while you push the hose in to place on the fitting such as a vice grip. Insert the hose into the fitting, the hose WILL be tight so as you push it into the fitting give it a twist motion and make sure the hose goes as far into the fitting as possible.

Insert the hoses into the AN8 fittings — photo 1

This is how the fitting and hose should look after it is inserted correctly.
Insert the hoses into the AN8 fittings — photo 2

5Step 5Tighten the AN fittings
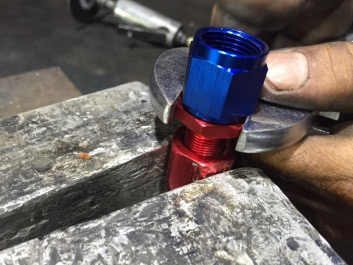
Take the other threaded portion of the AN fitting and insert it. Hold down the fitting again with a vice grip or something to grasp it and use an open wrench (preferably aluminum to not scratch or damage the fitting) and tighten it down. Once you have finished tightening down the fitting you are ready to install the cooler.

Tighten the AN fittings — photo 1

Tighten the AN fittings — photo 2

6Step 6Attach the brackets and anti-vibration mounts
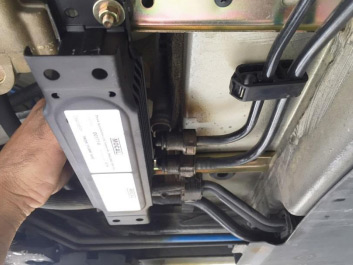
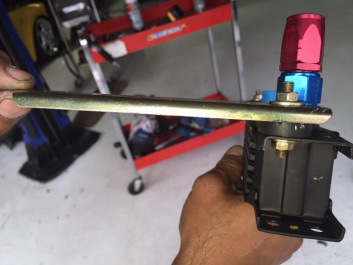
Before installing the cooler to the vehicle, attach the two gold brackets supplied with the kit to the cooler as shown in the photo. Make sure to install the anti-vibration mounts in the correct position as well.

Attach the brackets and anti-vibration mounts — photo 1 Attach the brackets and anti-vibration mounts — photo 2
7Step 7Position and mount the cooler
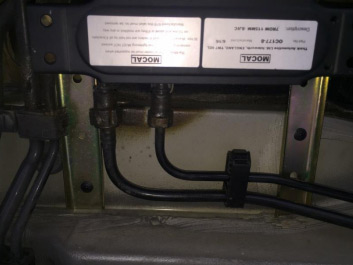
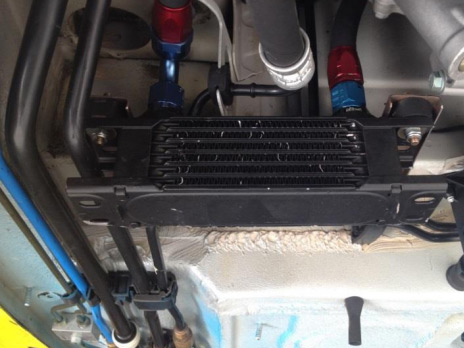
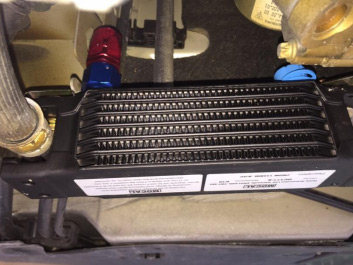
With the cooler and brackets attached, make sure the vehicle is lifted off the ground securely so you can access the underbody. The cooler kit is installed on the left side (driver side) portion of the vehicle. Before drilling your holes to secure the brackets in place, mock up the cooler in place to ensure correct fitment. Once you have it mocked up, install the brackets. You can either use rivets or self-tapping screws for this.

Position and mount the cooler — photo 1

Position and mount the cooler — photo 2

NOTE: On 986 Boxster installs, the AN8 90 degree fitting is installed on the LEFT side and the AN8 straight fitting on the RIGHT side. On 987 Boxster / Cayman installs, the AN8 90 degree fitting is installed on the RIGHT side and the AN8 straight fitting on the LEFT side. The reason for this is due to clearance differences between the two models.
Position and mount the cooler — photo 3

8Step 8Identify the low-pressure return hose
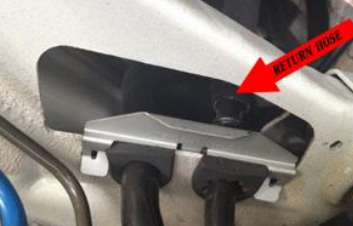
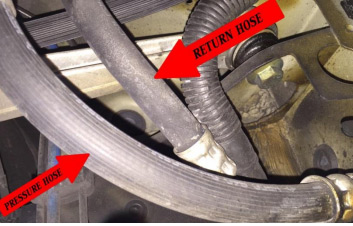
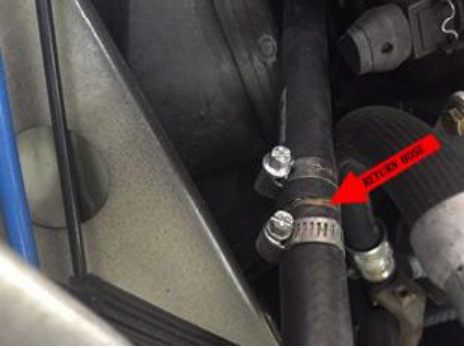
It’s time to install the fluid hoses. It is VERY important that you do NOT cut the high pressure line on the power steering, you are ONLY working with the low pressure return hose on the system.

Photo on right shows pressure hose and return hose on 987 cayman/boxster.

Photo on left shows the two lines on a 986 boxster, the right side one is your return hose.
Identify the low-pressure return hose — photo 1

Identify the low-pressure return hose — photo 2
9Step 9Connect the first return hose
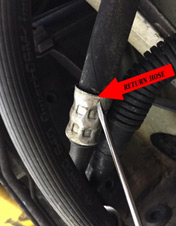
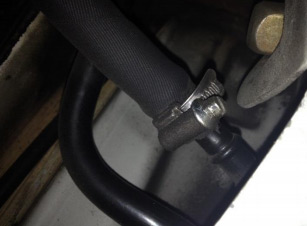
Disconnect the power steering return hose from the hard line and connect the new return hose that is attached to the AN fitting on the left side of the cooler (90 deg for 986 / straight for 987). Photo on the right shows the new return hose installed on the rigid line on a 986 and clamped in place. This is the hard line that has the original hose connected that you need to disconnect. 987 owners see important note below.

Connect the first return hose — photo 1

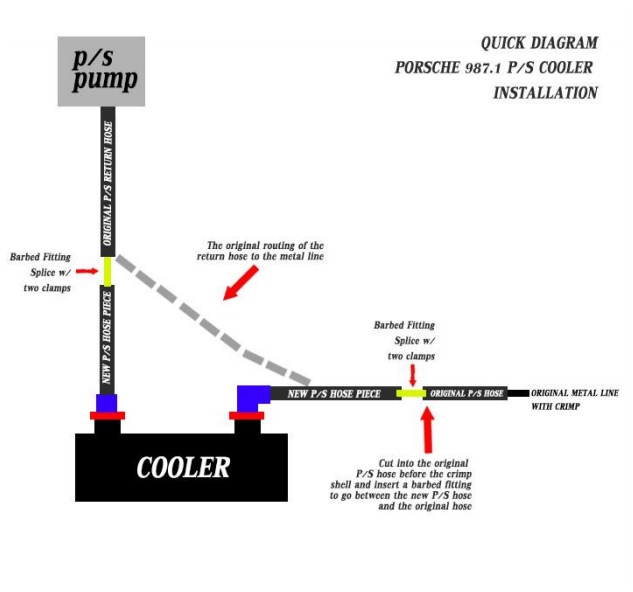
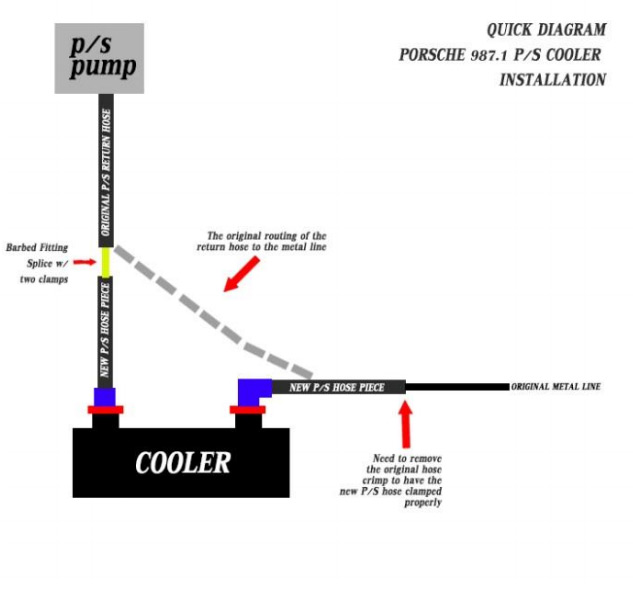
**IMPORTANT FOR 987 CAYMAN/BOXSTER OWNERS – The return hose on your vehicle is secured with a crimp fitting.

There are two ways you can tackle this.

  • Option 1: cut the existing crimp fitting on the vehicle and install the new hose with a clamp on the end.
  • Option 2: Leave the crimp fitting in place and cut a section of hose further from it and use the 2nd supplied barbed fitting between the original hose and new hose.

THESE OPTIONS ARE FOR 987 BOXSTER/CAYMAN ONLY. IT DOES NOT APPLY TO 986 BOXSTER.
Connect the first return hose — photo 2 Connect the first return hose — photo 3

Connect the first return hose — photo 4

10Step 10Connect the second return hose
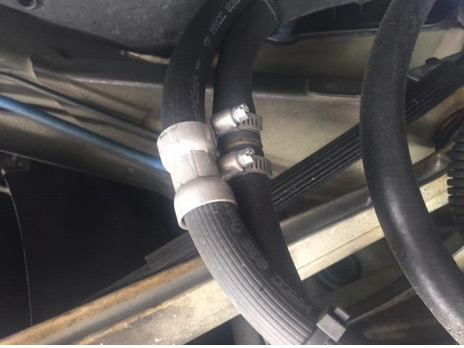
Now that you have the initial hose in place, it’s time to connect the second fluid hose. Locate the other end of the original return hose for the power steering. Insert the barbed fitting in between the original hose and the new fluid hose. Secure both sides of the hose down with the clamps provided.

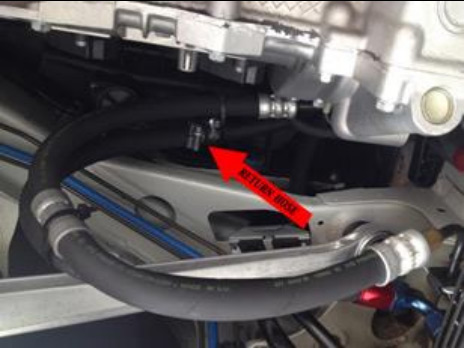
The top photo on the right shows the return hose connected to the AN90 fitting on the cooler and following that hose leads you to two clamps securing the barbed fitting that splices in between the new hose and the original return hose.

The middle & bottom photo on the right shows the return hose that has been connected by the barbed fitting installed in between with the clamps.

This is the same procedure for 986 and 987.
Connect the second return hose — photo 1

Connect the second return hose — photo 2

Connect the second return hose — photo 3

11Step 11Fill the system and check for leaks
Once you have everything in place and double checked your work, you will need to top off the power steering fluid. We recommend Pentosin CHF202 fluid.

Follow the proper factory fill procedures. Once you have completed filling the system, start and run the vehicle and ensure you have no leaks.

12Step 12Complete a test drive
Go on a test drive!