TuneRS Mall Logo
We’re expanding our online store!
We’re improving our website and adding new parts daily.
Can’t find a part or need help with an order? Contact us—we’re happy to help.
← All installation guides

TuneRS technical resources

2-Quart Deep Sump Kit

Kit components, baffle preparation and deep sump installation.

986 / 987 / 996 / 997 · M96 / M9716 steps
Download guide PDF
Before you begin

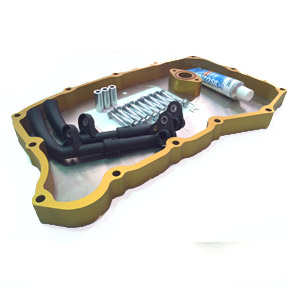
Before you begin — photo 1Follow the instructions below for proper installation of your new 2 quart deep sump kit.

Recommended professional installation. Failure to follow instructions correctly can damage components or your vehicle.

This kit is recommended for off-road use due to clearance issues that may arise with street vehicles. Take full precaution when performing the installation. If you have technical questions or need assistance please give us a call at 954.345.7877

Fitment:

  • 1997 – 2008 Porsche Boxster / Boxster S
  • 2005 – 2008 Porsche Cayman / Cayman S
  • 1998 – 2008 Porsche Carrera / Carrera S
  • Excludes GT2, GT3, Turbo & DFI models

KIT COMPONENTS:

  • 2x Oil tubes (part no. 997.107.016.00)
  • 1x aluminum baffle gasket
  • 1x aluminum 2qt pan extension
  • 1x aluminum pickup spacer
  • 3x aluminum 1-1/16” spacers
  • 1x pickup spacer o-ring
  • 1x Reinzosil Universal Sealing Compound
  • 18x hex head bolts (3 told hold plastic baffle, 15 to bolt oil pan in place)

**These instructions begin after the oil pan and pickup tube have been removed from the vehicle. Most of the images shown on these instructions will be inverted from what you actually see as this engine in the photos is off of a vehicle and on an engine stand. In your case, you will be looking at it from underneath the vehicle, so invert the images.

We recommend before doing the final installation of the deep sump to do an initial mock up to ensure fitment is correct. Once you place the sealant to the deep sump it becomes very difficult to remove.

Installation steps

1Step 1Remove the oil pan and inspect for debris
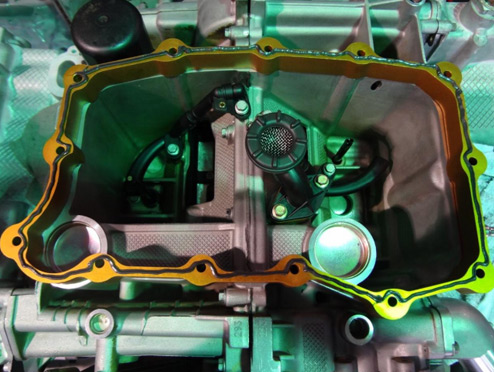
Remove oil pan, baffle and pickup tube. It is best to clean the area and pan once you do this. Take the opportunity to also inspect for any metal debris in your oil pan. If you find metal at this time – stop immediately and consult your local Porsche professional as you may have an internal problem.

Remove the oil pan and inspect for debris — photo 1

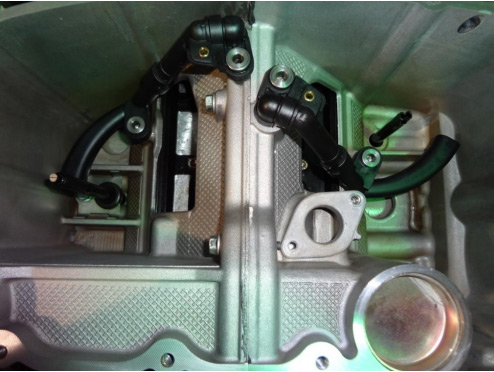
2Step 2Install the two oil tubes
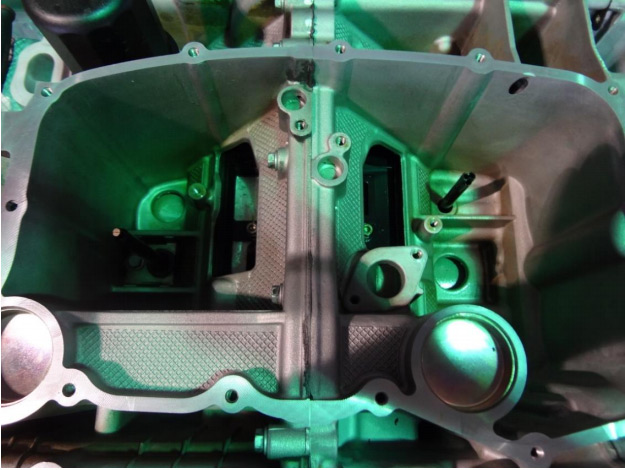
Install two (2) oil pickup tubes (part no 997.107.016.00) as shown below.

Install the two oil tubes — photo 1

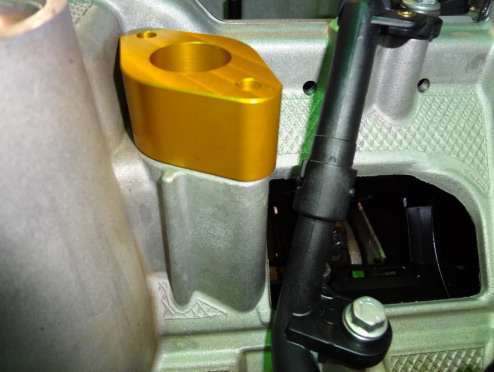
3Step 3Install the pickup spacer and O-ring
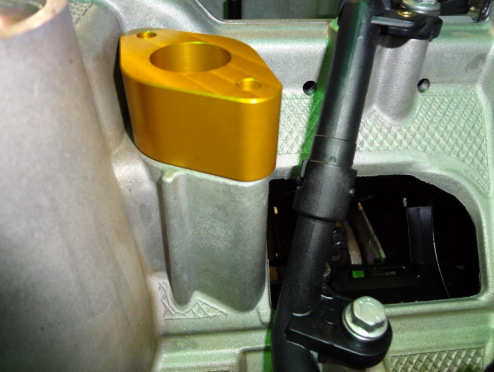
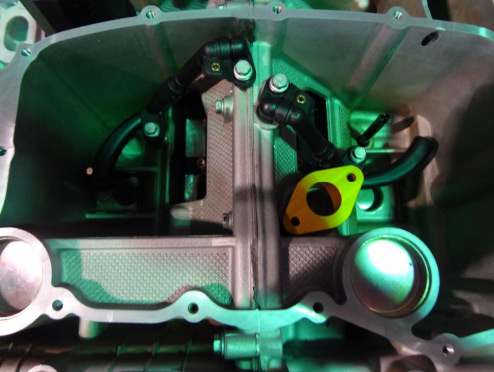
Install oil pickup tube aluminum spacer as shown below.

**Be sure you installed the supplied O-ring between the spacer and engine casting.
Install the pickup spacer and O-ring — photo 1

Install the pickup spacer and O-ring — photo 2

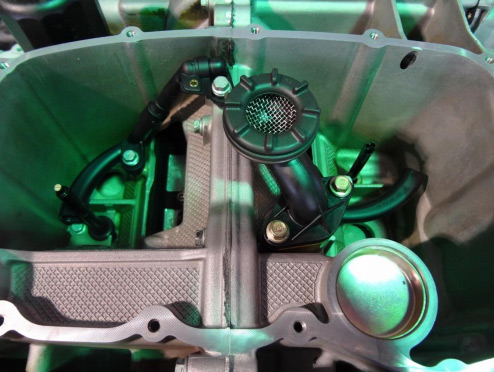
4Step 4Reinstall the pickup tube
Install oil pickup return tube and bolt down using two of the supplied hex bolts.

Reinstall the pickup tube — photo 1

Reinstall the pickup tube — photo 2

5Step 5Apply sealant to the oil pan
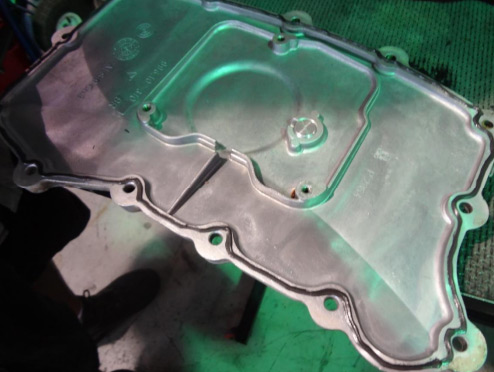
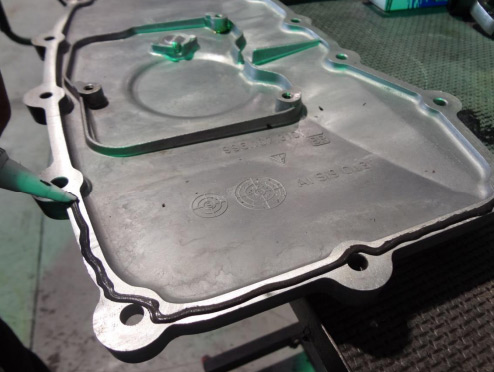
Using the provided Reinzosil sealant, apply to edge of oil pan (as shown below).

Apply sealant to the oil pan — photo 1

Apply sealant to the oil pan — photo 2

The aluminum baffle spacer does NOT mount to the oil pan itself, it will mount between the engine block and 2 quart extension. The 2 quart extension will mount directly to the oil pan, with the aluminum baffle spacer between block and extension. (see below).

6Step 6Modify the original plastic baffle
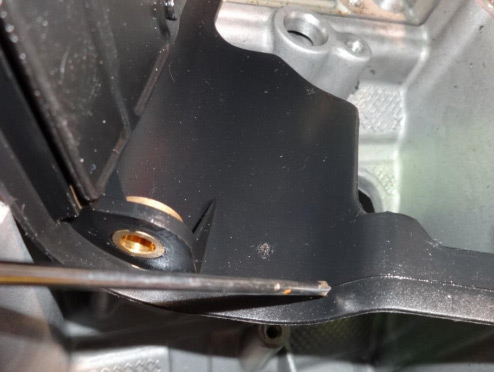
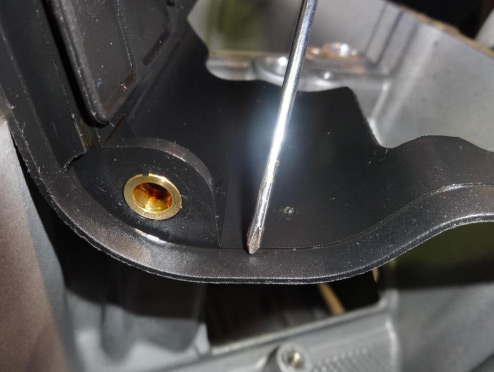
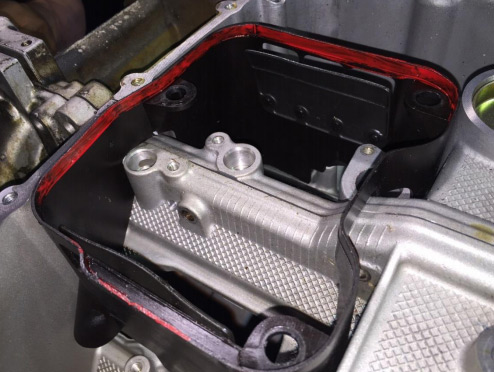
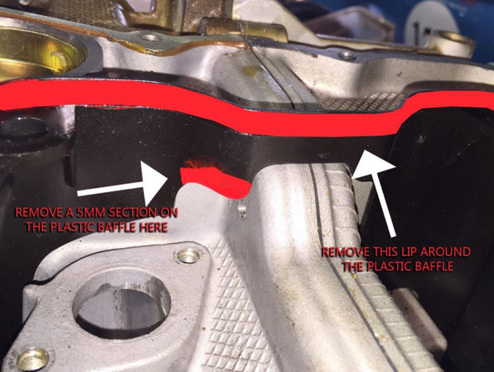
 You must modify the original plastic baffle. Remove the outer lip (use the line marked in red as a reference. Remove material all the way to the line, it is about 5mm). On the same plastic baffle, remove 5mm of the area marked in red in the photos.

Modify the original plastic baffle — photo 1 Modify the original plastic baffle — photo 2 Modify the original plastic baffle — photo 3 Modify the original plastic baffle — photo 4

7Step 7Apply sealant to the extension
 Apply sealant to the extension as shown below. NOTE, DO NOT MOUNT THE EXTENSION DIRECTLY TO THE BLOCK.

This is what your thin coat of sealant should look like on the extension.
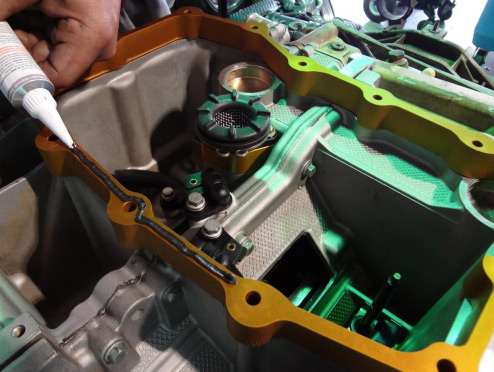
Apply sealant to the extension — photo 1

Apply sealant to the extension — photo 2

8Step 8Mount the extension to the oil pan
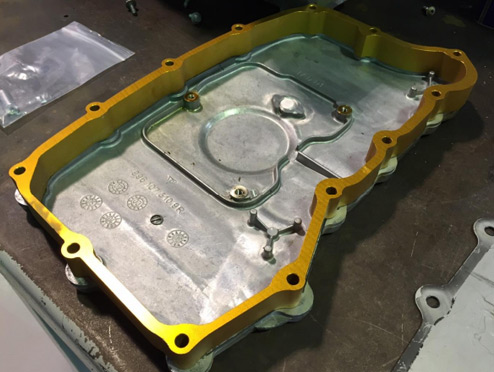
Mount the deep sump extension to the pan. (Note, the photo does not show the pan extension with the sealant. Make sure you have applied the sealant before installing the aluminum baffle on top).

Mount the extension to the oil pan — photo 1

9Step 9Install the aluminum baffle plate
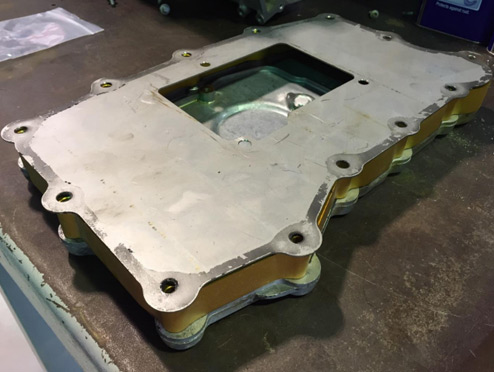
 Next, mount the baffle plate to the deep sump extension. Make sure to apply sealant between the extension and baffle.

Install the aluminum baffle plate — photo 1

10Step 10Position the aluminum spacers
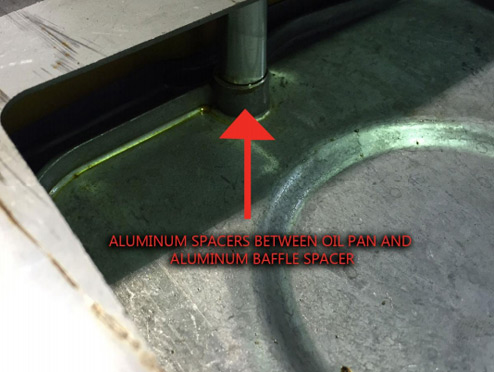
 With the baffle in place, align the 3 aluminum 1-1/6” spacers between the baffle plate and oil pan.

Position the aluminum spacers — photo 1

**Note: previous versions of our Deep Sump kits did not come supplied with these 1-1/16” aluminum spacers (pre-2014). If your kit did not come with them, you can use locking hardware to secure the plastic baffle in place**

11Step 11Install the modified plastic baffle
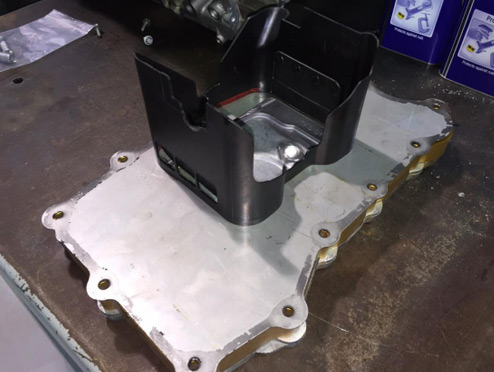
 Install the plastic baffle on top of the aluminum baffle plate after it has been modified as mentioned previously in the instructions.

Install the modified plastic baffle — photo 1

12Step 12Prepare the assembly for installation
 Once you have your deep sump kit looking like this, it is time to install it into the engine block.

Make sure to apply sealant between the baffle and the engine block.

13Step 13Install the pan and deep sump assembly
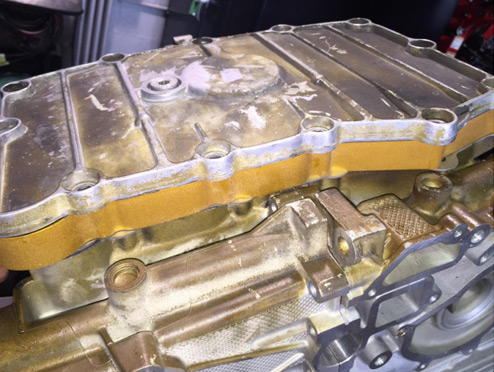
 With the supplied bolts, install your oil pan and deep sump extension into the block.

Install the pan and deep sump assembly — photo 1

14Step 14Refill the engine oil
Add engine oil to proper level. Remember, you now have 2 extra quarts of oil to add during your oil fill up.
15Step 15Start the engine and check your work
Crank the engine (after adding correct amount of oil) and check your work.
16Step 16Complete a test drive
Test drive and enjoy your Porsche!